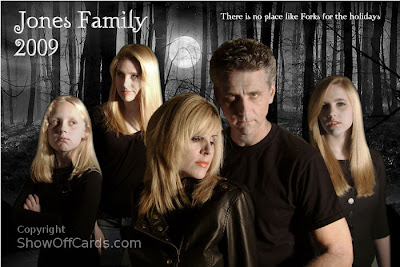
 I would like to start this post with two disclaimers:
1) Neither I nor any of my family believe in vampires or the undead. We have a Christmas card reputation to uphold and well, after a while you just have to push the boundaries.
2) If this post is viewed by anyone with any real graphic design training I encourage you to leave now. You will most definitely be offended by my ham-handed digital editing. There. You've been warned.
With that behind me, here is how we made some friends and family smile and some recoil in horror this Christmas.
The "inspiration" photo
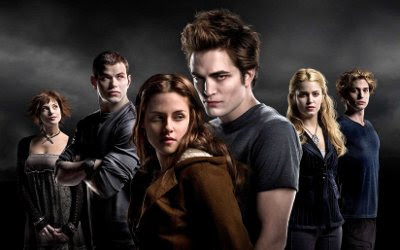
Equipment:
- Any decent auto-focus digital camera
- Tripod. Or in my case a stepladder with a board between two rungs.
- Great big halogen shop light
- Ultra cheap trouble light
- Photoshop if you have it but for this project I forced myself to use GIMP for the first time. Why? It's a long story but I recently switched my computer operating system to Linux Mint which doesn't run PhotoShop so I wanted to try GIMP which is the free open-source alternative to PhotoShop.
My garage. After dark. Blinding halogen shop light shining in from the right. Softer trouble light pretty close to the subject giving a little light to the left side. This gives heavy shadowing for that creepy look. Take lots of shots because the ladies are PICKY.
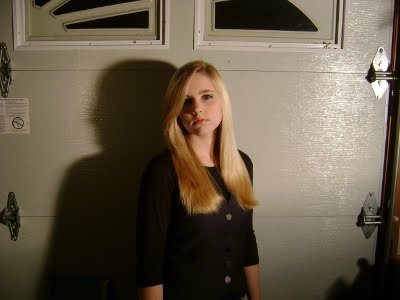
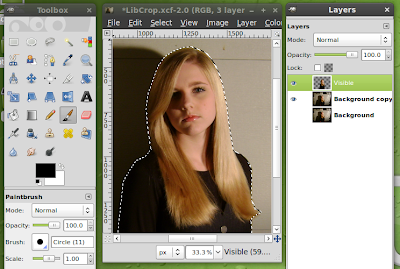
Step 2: Crop the people out of the background.
I do this using the "free select" tool to outline the person and then create a new layer with just the person - no background. Because this creates a layer with a sharp edge I soften the edges a bit with the blur tool - especially the hair. Save and repeat for all your people.
Step 3: Create a very creepy background
Ok, create is a bit misleading. By "create" I really mean Google "dark forest" or "moonlit forest" until you find a high resolution that is at least 4"x6" at 300 dpi. Not sure how to tell? Open an image in GIMP and click on Image / Print Size. I found one that looks better than the New Moon background.
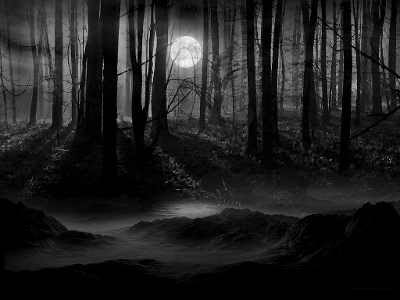
Step 4: Add people to the background
Open the background file. Open one of your people files where you cropped them out and just drag the cropped person layer onto the background.
Step 5: Make your people creepier
Next we need to whiten our people up a bit. Create two copy layers of the original and place them above the original. Take the layer directly above the original and desaturate it (Make it grayscale). The top of the three layers is a full color copy of the original layer.
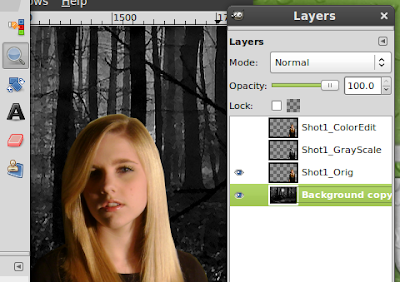
So you have three layers
- Color layer to edit
- Grayscale underneath
- Original backup
Now, working on the top color layer only I turned down the opacity to about 80% which lets some of the grayscale come through and subdue the colors.
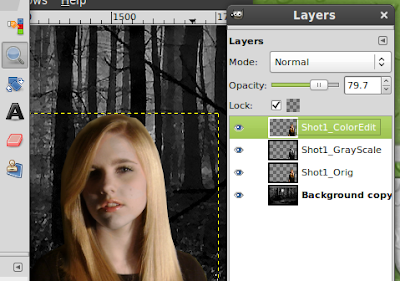
To further whiten the skin you can use the eraser set at about 20 percent and erase more color from the "skin" portions of the top layer.
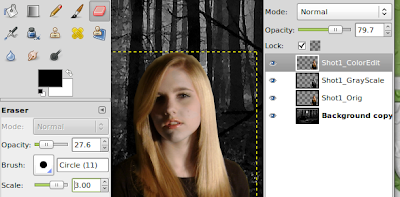 Step 6: Rinse and Repeat
Finally, go through the same process for the other people. Scale down the people in the back a bit so the perspective looks correct, drop in a layer with text and there you have it. One of the creepiest Christmas cards ever. Hope you enjoyed it.

P.S. The Walgreens photo department questioned me about "copyright" issues when I picked up my prints - so I guess I'll take that as a compliment.
1 comment:
you rock, my man. 5 or 6 colleagues commented on the picture last night (it is on display at the estee lauder counter) and could not believe the picture was taken, 1. in our garage 2. with a handheld light hanging on a ladder 3. as single shot photo's.
i love it.
Post a Comment